
We are excited to announce that GoFigr now supports authentication with API keys. In fact, the Python client now uses it by default as of version 0.14.0.
API keys remove the need to provide the username and password when using the API, and can be created and revoked at will. We support up to 25 keys per user, so you can create separate keys for every environment where you use GoFigr, e.g. a work laptop and a shared server.
Creating API keys
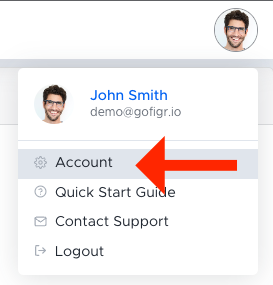
To create an API key in the Web UI, click on your Avatar in the upper-right corner, then Account:
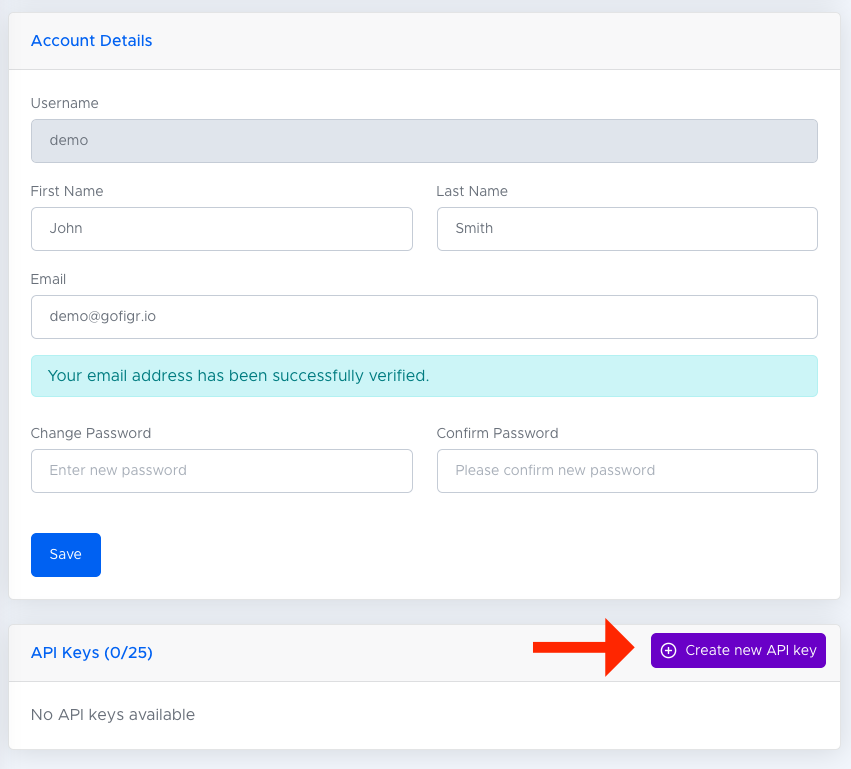
On the Account page, you will see an “API Keys” section. Click the “Create new API key” button.
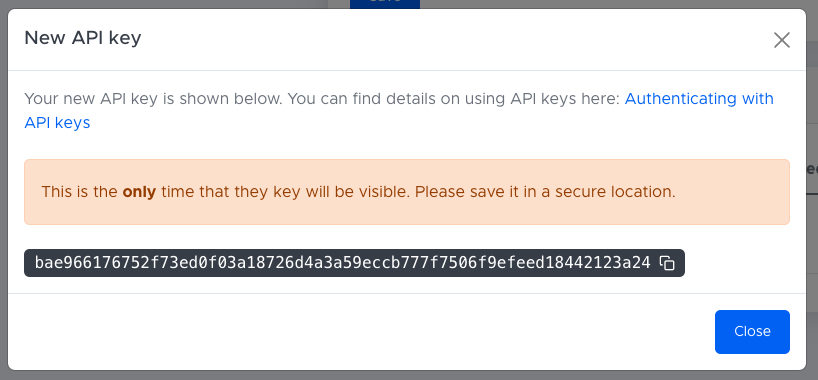
You will be prompted to name the key. This name is for your reference only, but aim for something informational like “John’s laptop” or “Analysis server”.

GoFigr will create and display your private API key. This is the only time this key will be visible, so please be sure to write it down or store it in a secure location. See instructions below for how to setup GoFigr to use your new key.
Using API keys
There are several ways to setup the API key, but we recommend re-running the gfconfig tool.
gfconfig (recommended)
The easiest way to use API keys is to re-run the gfconfig tool and entering the key when prompted:
$ gfconfig
------------------------------
GoFigr configuration
------------------------------
Username: demo
Password:
Verifying connection...
  => Authenticated successfully
API key (leave blank to generate a new key): bae966176176752f73ed0f03a18726d4a3a59eccb777f7506f9efeed18442123a24
  => Connected successfully

Please select a default workspace:
  [ 1] - Primary Workspace              - demouser's primary workspace   - API ID: 98f328fc-f984-482c-b7f6-8ed272527a42
  [ 2] - Rocketship Bio                 - Let's do some science          - API ID: bff6c952-fb2c-4333-80e5-5dc7291d47cc
  [ 3] - Plotly demos                   - N/A                            - API ID: 1424ea0f-7d42-4ef5-9ba8-41aa9c5b1a94
Selection [1]: 1

Configuration saved to /Users/maciej/.gofigr. Happy analysis!
Configuration file (.gofigr)
You can also set the key in your .gofigr configuration file (located in your home directory):
{
    "api_key": "bae966176176752f73ed0f03a18726d4a3a59eccb777f7506f9efeed18442123a24",
    "workspace": "7cb550dc-d06d-4767-95cb-bda0baf7a2d2"
}
Jupyter Notebook
You can also hard-code the API key in the call to configure in your Jupyter notebook, like so:
%load_ext gofigr
from gofigr.jupyter import *

configure(
    api_key="bae966176176752f73ed0f03a18726d4a3a59eccb777f7506f9efeed18442123a24",
    analysis=FindByName("Demo analysis", create=True))
Managing and revoking API keys
Revocation
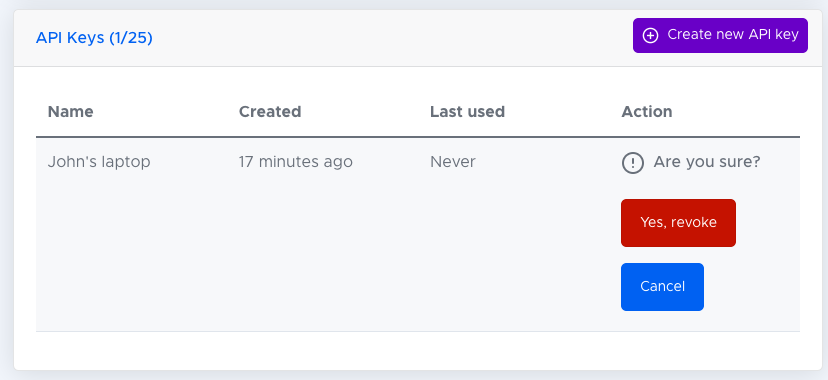
To revoke a key, go to your user account and locate the key in the “API Keys” section, then click “Revoke”. You will be prompted for a confirmation.
Revoking a key cannot be undone.
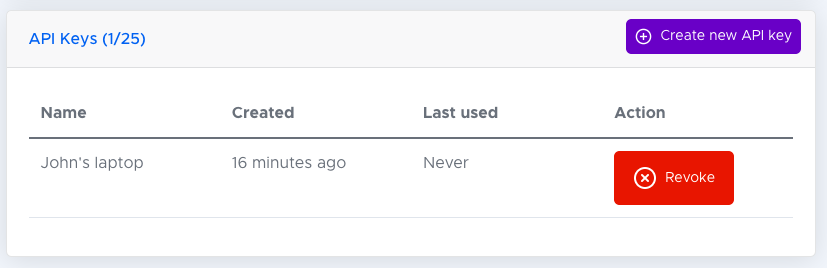
Monitoring
GoFigr automatically tracks the last time a key has been used. Please see the “Last used” column in the “API Keys” section.